
Gaggia Cadorna Error 02 – Grinder Motor Diagnosis and Repair Guide
The Gaggia Cadorna Prestige (SUP049EU) is a reliable bean-to-cup machine — but one of the most common faults reported by owners is Error 02, displayed with a wrench icon and the message “Service required — Read instruction manual for more information.”
This error appears after 1–2 cups of coffee, then clears when the machine is switched off and on again — only to return after the next cycle. This guide explains exactly what causes Error 02, how to diagnose it, and how to fix it based on a real repair carried out at ElPartsBay.
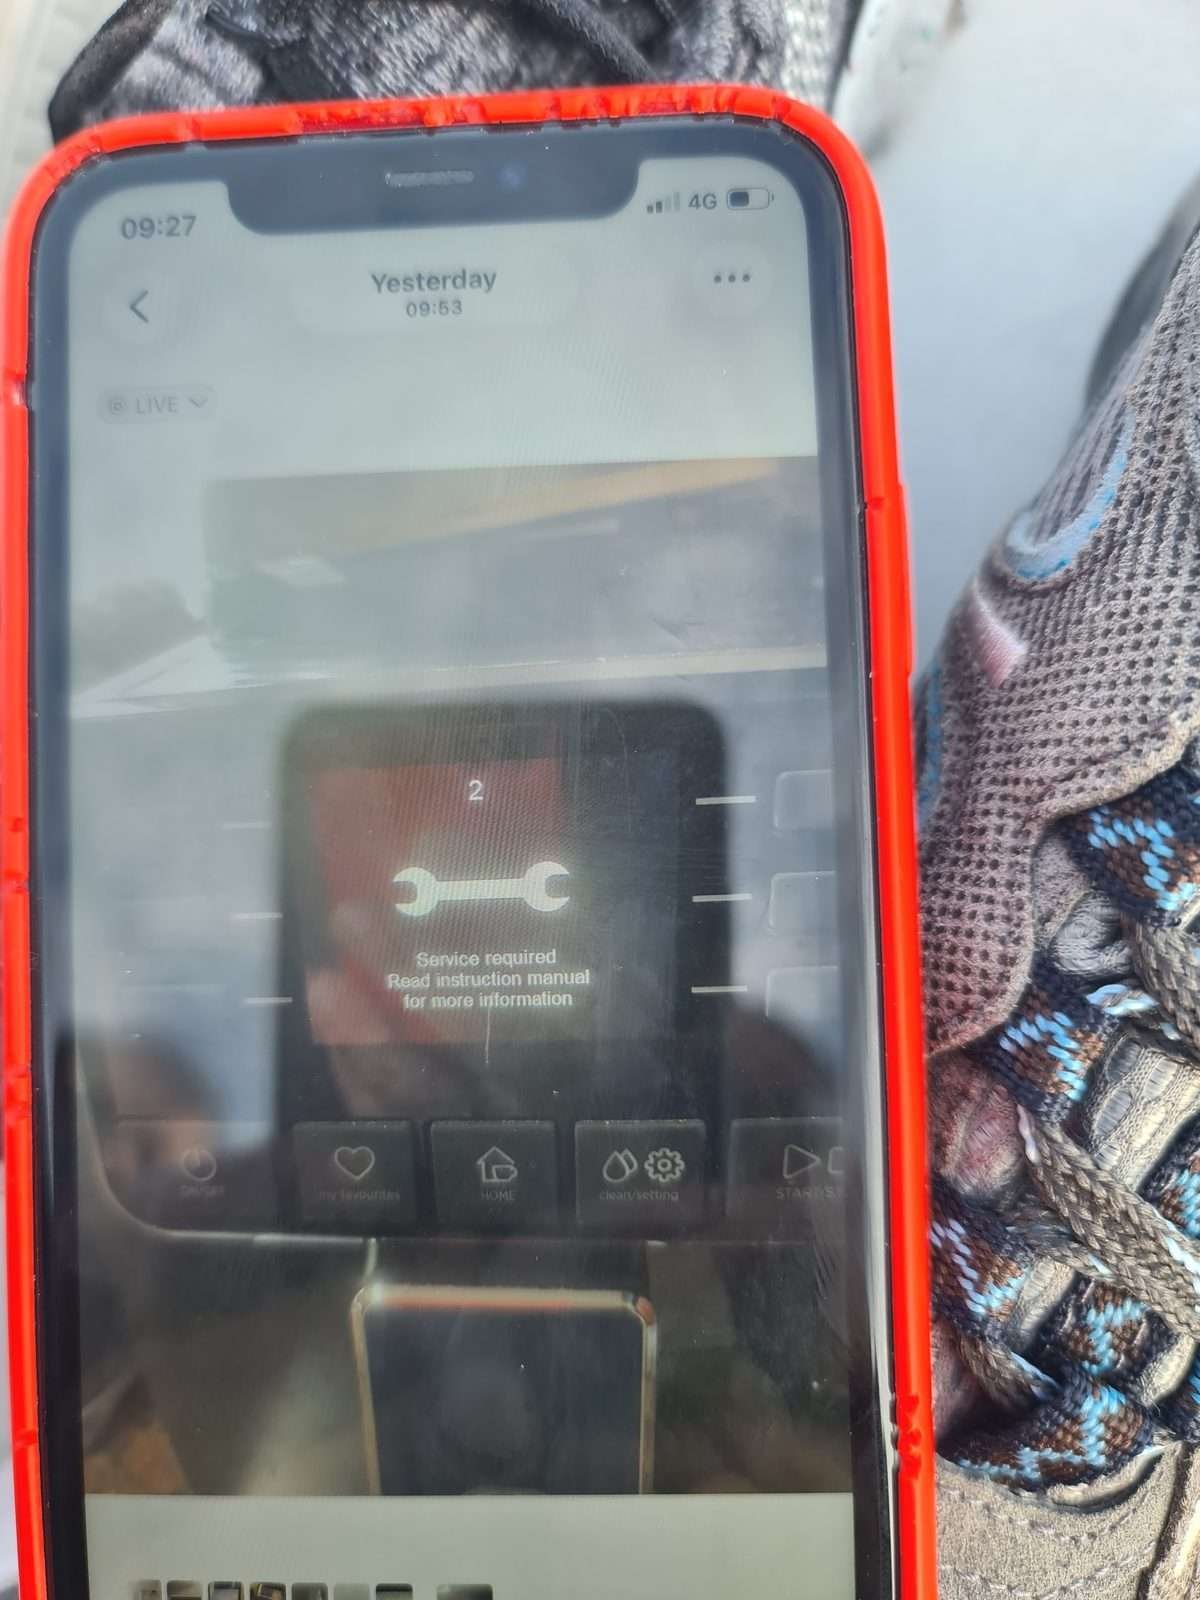
What Does Error 02 Mean?
According to the Gaggia Cadorna service manual, Error 02 means the grinder motor is disconnected or not responding. The CPU board sends a signal to the grinder motor and receives no confirmation that the motor is running.
This error has two possible causes:
- Mechanical: The grinder is physically blocked and the motor cannot turn
- Electrical: The motor is worn or the electrical connection is faulty
The key diagnostic clue is when the error appears:
- Error appears immediately when grinding starts → likely a blockage
- Error appears after 1–2 cups, machine works fine when cold → likely a worn motor
Step 1 – Check for a Grinder Blockage
Before opening the machine, always check for a blockage first. A blocked grinder is the most common cause of Error 01 and Error 02 and requires no tools to fix.
How to clear a grinder blockage:
- Remove all beans from the hopper
- Set the grinder to its coarsest setting
- Use a vacuum cleaner to clear the hopper and grinder chute
- Add a small amount of fresh, dry beans
- Attempt to make a coffee — the coarse setting reduces load on the motor
- If successful, gradually move back to your normal grind setting
Common causes of blockage: oily or dark-roast beans, stale beans with moisture, foreign objects in the hopper, or a grinder that has not been cleaned in several months.

Step 2 – Open the Machine and Inspect the Grinder
If clearing the blockage does not resolve the error, the machine needs to be opened for inspection. You will need a Torx T10 or T20 screwdriver.
Disassembly sequence:
- Remove the water tank, bean hopper, drip tray, grounds container, and brew unit
- Remove the upper housing cover (one screw)
- Slide off the left side panel (one screw on the side)
- Slide off the rear panel (one screw)
- The grinder assembly is now accessible
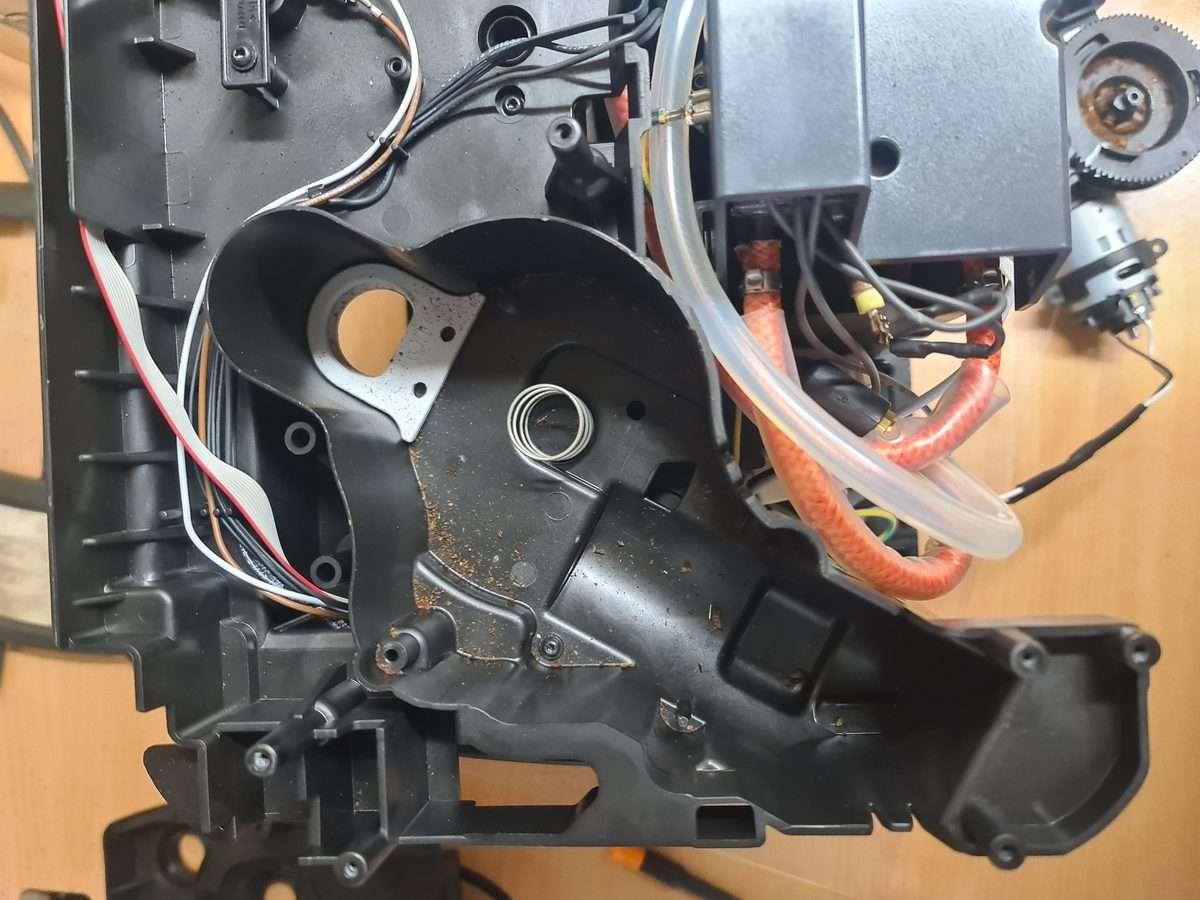
With the machine open, check the following:
- 2-pin electrical connector on the grinder motor — pull it off and firmly reinsert it. A loose connector is a common cause of intermittent Error 02
- Wiring from the connector to the CPU board — look for any chafing, breaks, or heat damage
- Physical condition of the motor — any burning smell, discolouration, or visible damage
Step 3 – Test the Grinder Motor
If the connector and wiring appear intact, the motor itself needs to be tested. You will need a multimeter.
Resistance Test
Disconnect the 2-pin connector from the motor. Set your multimeter to resistance (Ω) and measure across the two motor terminals (the gold-coloured contacts at the base of the motor).
Expected reading: 10–50 Ω
A reading significantly higher than 50 Ω indicates worn carbon brushes or a damaged commutator. A reading of OL (open circuit) indicates a broken internal connection.
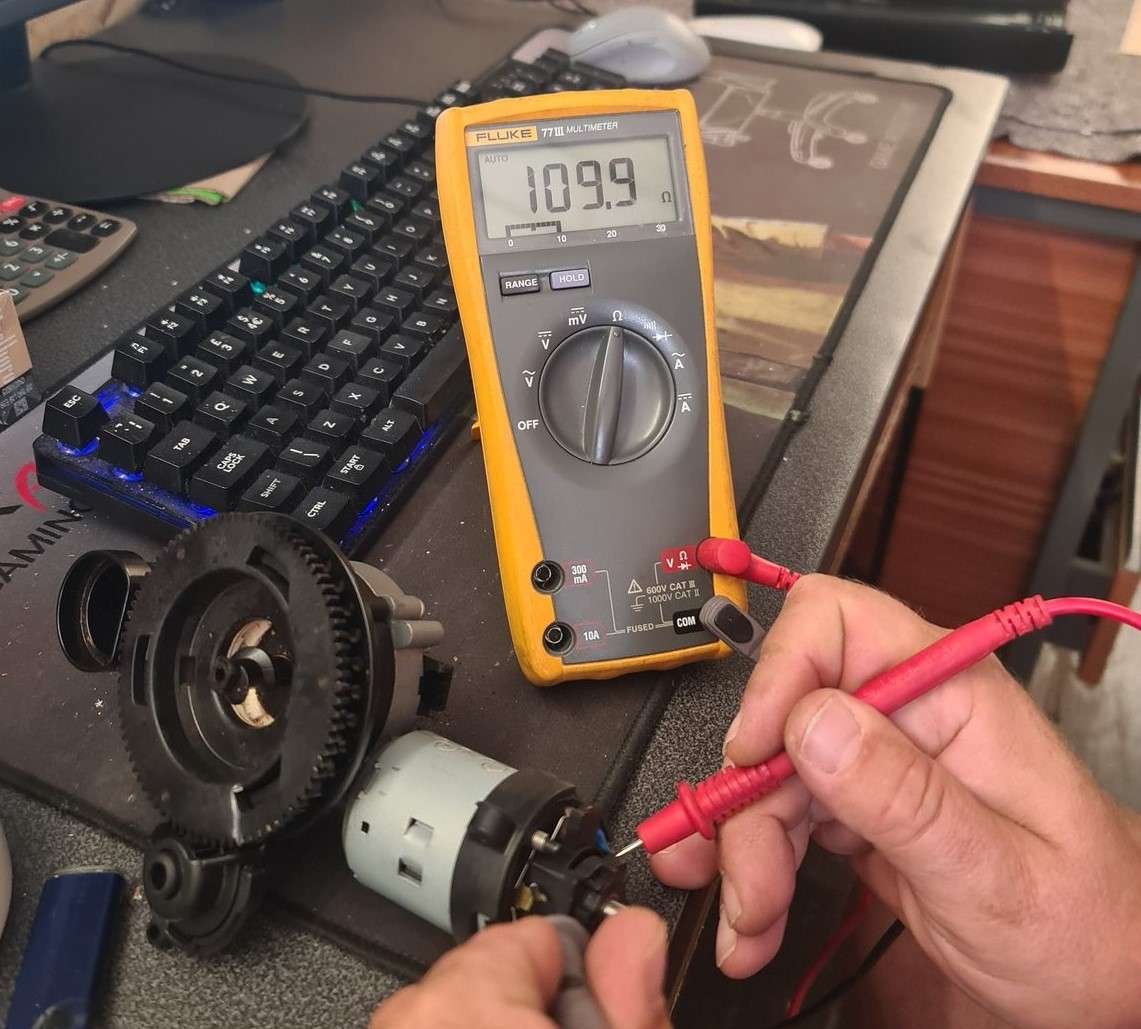
In this repair, the motor measured 109.9 Ω — more than double the acceptable maximum. This confirmed an electrical fault rather than a mechanical one.
Bench Test with Power Supply
If you have a bench power supply, you can test the motor directly. The Gaggia Cadorna grinder motor (WZMOTOR CR097-JSDR001) operates at 230V DC in the machine, but can be safely tested at lower voltages to check basic function.
Apply 12–24V DC to the motor terminals. A healthy motor will spin freely with a current draw of 0.2–0.4A. A worn motor may:
- Fail to start from rest and require a manual spin to begin rotating
- Draw excessive current (above 1A at low voltage)
- Run intermittently depending on brush position
In this case, the motor ran at 15–24V but required a manual push to start from certain positions — a classic symptom of worn carbon brushes losing contact with the commutator.
Step 4 – Inspect the Carbon Brushes
The grinder motor uses carbon brushes to transfer current to the rotating commutator. Over time, these brushes wear down and lose reliable contact — particularly when the motor heats up during use, which is why the fault appears after 1–2 cups rather than immediately.
To access the brushes, remove the brush holder cap at the base of the motor (two small clips or a twist-off cap depending on the motor version).
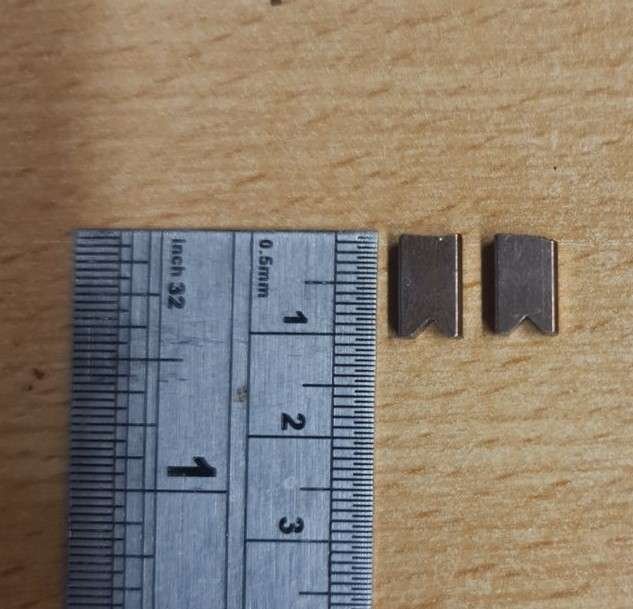
What to look for:
- Brush length below 3–4mm → replace brushes
- Brush surface glazed or uneven → replace brushes
- Commutator surface dark, oxidised, or scored → clean or replace motor
In this repair, the brushes measured approximately 8×8×5mm and appeared adequate. However, the commutator surface was heavily oxidised, preventing reliable electrical contact. Cleaning the commutator with P400–P600 grit abrasive paper (wrapped around the commutator and rotated by hand) can restore contact in mild cases.
Step 5 – Replace the Grinder Motor
If cleaning the commutator does not resolve the fault, or if the motor resistance remains above 50 Ω, the motor needs to be replaced.

Compatible motors:
- Original Gaggia part: 996530049898 (MOTOR COFFEEGRINDER V3.2 230V)
- Motor designation: WZMOTOR CR097-JSDR001
- Also compatible with: Saeco, Philips bean-to-cup machines of the same generation
- Donor machine compatible: Gaggia DAP NL9206AD-4a Drachten — all internal parts including the grinder motor are identical
Motor replacement procedure:
- Disconnect the 2-pin electrical connector from the motor
- The motor slides out from the grinder housing — no screws hold it in place, it is retained by the housing clips
- Slide the replacement motor in, ensuring it seats fully
- Reconnect the 2-pin electrical connector firmly — push until it clicks
- Reassemble in reverse order
Motor replacement takes approximately 10–15 minutes once the machine is open.
Reassembly and Testing
After replacing or repairing the motor:
- Reassemble the machine — panels, hopper, brew unit, drip tray
- Fill the hopper with fresh, dry beans
- Set the grinder to the coarsest setting
- Run 2–3 coffees to verify the error does not return
- If no error appears, gradually return to your preferred grind setting
In this repair, the motor replacement resolved Error 02 completely. The machine was returned to the customer after running 5 test cycles without fault.
Preventing Error 02 – Maintenance Tips
To reduce the likelihood of grinder motor failure:
- Use fresh, dry beans — avoid oily dark-roast blends which coat the grinder burrs and increase motor load
- Clean the grinder monthly — use a dry brush to clear the chute; never use water in the grinder area
- Do not leave beans in the hopper for extended periods — stale beans absorb moisture and clump
- Run a cleaning cycle monthly — reduces coffee oil buildup throughout the machine
- Descale every 2–3 months — scale buildup increases load on the pump and boiler, indirectly stressing the motor electronics
Error 02 vs Error 01 – What is the Difference?
| Error | Meaning | Typical Cause | Solution |
|---|---|---|---|
| 01 | Grinder blocked | Bean blockage, foreign object | Clear blockage, clean grinder |
| 02 | Grinder disconnected / not responding | Worn motor, loose connector, wiring fault | Check connector, test motor, replace if needed |
Parts and Tools Required
| Item | Part Number / Spec | Notes |
|---|---|---|
| Grinder motor | 996530049898 | WZMOTOR CR097-JSDR001, 230V DC |
| 2-pin motor connector | 421946035831 | Check and replace if damaged |
| Torx screwdriver T10/T20 | — | For housing screws |
| Multimeter | — | For resistance and continuity testing |
| Bench power supply (optional) | — | For direct motor testing |
Frequently Asked Questions
Can I use a motor from another Gaggia or Saeco machine?
Yes — the WZMOTOR CR097-JSDR001 is used across multiple Gaggia and Saeco models. The Gaggia DAP NL9206AD-4a Drachten (an older model) uses an identical motor and can serve as a donor machine. Always verify the motor shaft diameter matches before fitting.
My machine shows Error 02 immediately, not after a few cups — is it still the motor?
An immediate Error 02 on startup is more likely a loose or broken connector, or a complete motor failure rather than wear. Check the 2-pin connector first. If the connector is secure and the motor reads OL on a multimeter, the motor has an open circuit and needs replacement.
How long does a replacement motor last?
A new or good-condition replacement motor, combined with regular grinder cleaning and fresh beans, should last 5–8 years under normal domestic use.
The error cleared after I switched the machine off and on — does it still need repair?
Yes. A fault that clears on reset but returns after 1–2 cycles will worsen over time. The motor is losing contact as it heats up. Continued use risks complete motor failure or, in rare cases, damage to the CPU board.
This guide is based on a real Gaggia Cadorna Prestige SUP049EU repair carried out at ElPartsBay, Laytown, Co. Meath, Ireland. For coffee machine repair enquiries or spare parts, visit the ElPartsBay shop or contact us.